Handy GPS Quick Start Guide
Last updated Apr 2018
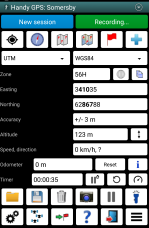
Enabling the GPS to get a location fix
To turn on the GPS receiver, press the button at the top-left corner of the app to take you to the appropriate system property page.
Turn on the Location option, and make sure the mode is set to "High accuracy". Then press the back button to return to the app.
The app will show the text "No GPS fix" in the Accuracy field until a GPS location can be determined by the system.
Make sure you are in the open and wait. Sometimes it takes a minute or two to get a GPS fix. Enabling cellular data will speed this up.
Once a fix is available, the fields on the main page of the app will show the appropriate values from the GPS receiver.
Next, press the red button at the top right labelled "Paused" to start recording the track log, and updating the odometer and timer. After you press this button, it will change to green and the label will change to "Recording".
Storing your current location
Once you have a GPS fix, to record your current location, just press the blue "+" button which is at the top right of the main screen of the app.
This will prompt you for a name for the new waypoint.
By default the first waypoint will be called W1, the second W2, etc, but its better to enter more meaningful names.
Creating a waypoint by entering coordinates
If you want to manually enter the coordinates of a location that you want to go to, press the "+" button and un-tick the "Use current location" option. Coordinates must be entered in the coordinate system and datum
which are currently selected at the top of the main page (e.g. UTM / WGS84).
Going to a stored waypoint
If you want to be directed to a stored waypoint, press the red flag button which is the second from the right at the top of the main screen. This brings up a list of all the stored waypoints.
Click on a waypoint and then choose an action of "Goto" from the popup menu.
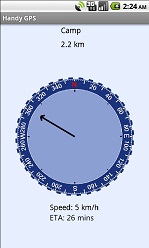
This will bring up the navigation page showing the distance to the waypoint and the bearing.
If you're moving, the compass bezel will be drawn in blue and the arrow will point the actual direction you should head to reach the waypoint. If however, you are stationary,
the compass bezel will be drawn in grey and the true or compass (magnetic) heading to the waypoint will be shown.
Using the compass page
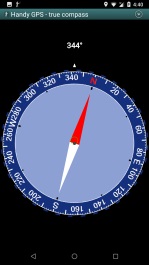
You can open the compass page by clicking the second button from the left at the top of the main screen. Note that the compass page will only work for devices which have a magnetic field sensor.
The red "N" on the compass page should always point towards magnetic north. To make sure the magnetic sensors on your device are correctly
calibrated move the device in a figure-8 in the air and/or rotate it on each of its axes in 3D space in turn.
Once the compass is calibrated, hold it level to get the best results. An artificial bubble helps you ensure your device is horizontal.
Showing your waypoints in a map
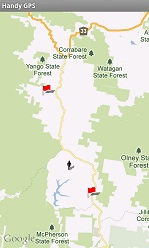
From the main screen of the app, you can press either one of the map buttons at the top centre to view your waypoints in context.
The left-most map button brings up a simple map which shows where you are currently and where the waypoints you have
recorded are. The map button to the right of this shows the same information, but overlays it on a Google map or satellite background. The map background images will only be available
if you currently are in range of a cell phone tower and have data enabled.
Viewing your track log
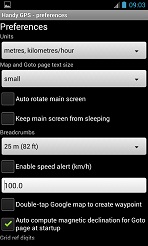
Track logs are enabled by default, but to change the resolution you can go to the preferences page by clicking the gear cog icon at the bottom left of the main screen. Everytime you move by more than the specified distance a new track log point will be stored to allow you to see where you're been.
With this feature enabled, your tracks will be visible on both of the map pages and you can also export the tracks to KML and GPX files along with your waypoints.
Importing waypoints
Handy GPS can import waypoints and tracklogs from both Google Earth KML and GPX (GPS Exchange) files. To import data, press the file open button on the toolbar at the bottom of the main page (or choose "Import" from the menu).
This will list all the files which are located in the HandyGPS folder on your phone's storage.
Simply click on one of the files in the list to import it. Imported data is added to the currently loaded data rather than replacing it.
Exporting waypoints
Once you have recorded waypoints and/or track logs and want to export them for archiving or use elsewhere, press the save button on the toolbar at the bottom of the main page (or choose "Export" from the menu).
This will prompt you for the output file name and then a file with be written to the HandyGPS folder on your phone's storage. To select which output format will be used (KML or GPX) go to the preferences page.
Back to the main help page
BinaryEarth.net


