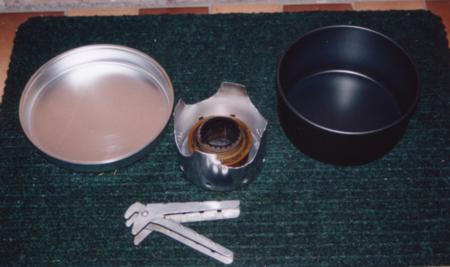
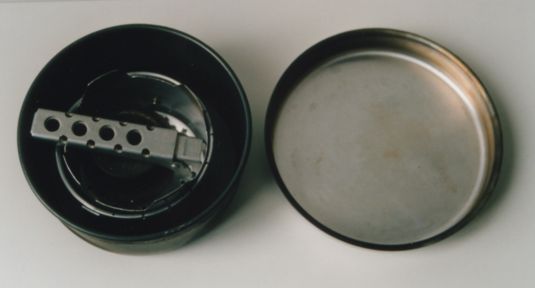
My pot stand (centre) with the Trangia burner and minimum cook-set.

Construction is simple. Just buy a small billy-can (10.5cm diameter) and mark a line around its circumference 75mm up from its base. Cut the top off the billy along this line with a hacksaw.
Next, scribe out 4 equally-spaced semi-circles (each with radius 30mm) around the top of the remaining can with a compass. Cut out the semi-circles with a small hack-saw, tin-snips, or better-still, a metal nibbling tool. Smooth any jagged edges with a metal file.
Finally, mark out 8 equally-spaced holes around the base of the billy can. Punch and then drill the holes with an 8 mm drill bit. File any jagged edges with a round metal file.
To use the "billy-can stand", just place it on the ground and put the Trangia burner in the middle of it. Light the burner and place a pot of water on the stand. Place the inverted saucepan lid over the pot to save energy.
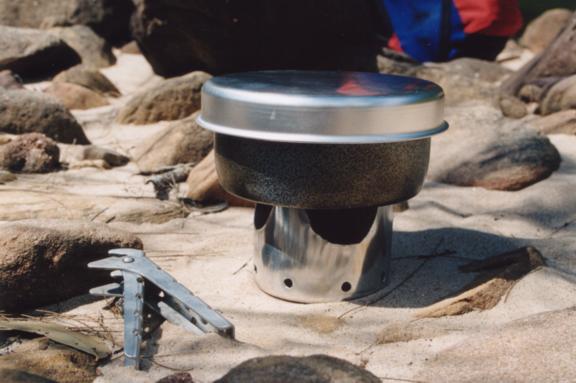
Field tests have shown this design to be quite stable, and reasonably quick to boil water. However, in strong winds the fuel efficiency is significantly reduced. Also, some modification will be necessary if you wish to use the simmer-ring, as the fully open simmer ring will not fit inside the billy-can stand. All you need to do is to change one of the semi-circular openings into a square slot with a width of 66mm and a depth of 30mm. Then, you will be able to insert the simmer ring even without lifting the pot off - an improvement over the original Trangia design!
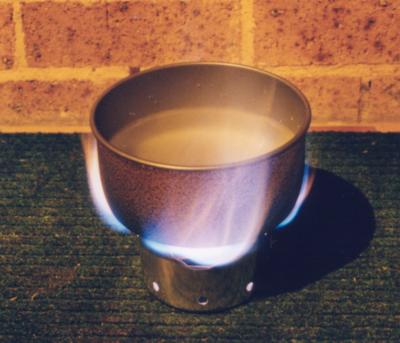
This time, I took a metal coffee canister which had the same diameter as my original billy-can and cut 6, 12mm radius semi-circles out of the top rim. I also reduced the size of the air intake holes at the bottom to 6mm and clustered them together on one side of the can. The intention here was to be able to face them into the wind to increase stove efficiency - as per the original Trangia wind-shield design.
The result of this modification to my design was disasterous! Shortly after the burner reached full power, flames started to come out of the bottom holes as well as the top ones! Alarmed that the whole arrangement could overheat and damage my burner, I extinguished it with the simmer-ring before it had a chance to boil the pot of water. What seemed to be happening was that without enough oxygen for the fuel to burn in the burner, the hot metho was evaporating and not combusting until it escaped from the can. Even after drilling more air intake holes around the can, combustion was still poor.
| Lesson 1: | Give the burner plenty of air! |
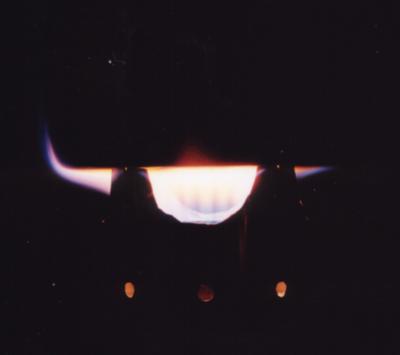
Looking at some time-exposure photos I had taken of my original design, I could see that the flame angle requires exit holes with a depth of about half the gap, or 15mm. The 12mm radius holes in this new prototype were just too small.
Something else which I tried in my third design was to drill the holes underneath the pot stand instead of around the bottom. This idea too, was based on going back to the original Trangia stove and seeing how the wind-shield system worked.
However, with the holes underneath, you obviously need to raise the stand off the ground to allow air to enter. One way of doing this is to cut a hole for the top of the burner, and sit the stand on the burner itself. This works, but is not as stable as my original pot stand design. An alternative would be to screw legs into the bottom of the stand - but this could be a bit fiddly in the bush and will increase stove set-up time.
A third option - which I eventually decided was the best - was to use the top part of the billy, which I had previously cut off and discarded, as a bottom wind-shield. To do this, I cut vertically through it on one side to allow it to spring open far enough to wrap around the rest of the stand. The idea is that the top stand will then be able to sit on the bottom wind-shield somehow to hold it off the ground. Of course, holes will need to be drilled in the bottom wind-shield to allow air to enter.
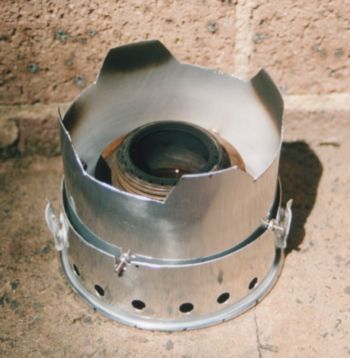
To connect the top part of the device with the bottom, four fixed studs sticking out of the main pot stand, and a few shallow locating notches in the bottom wind-shield will do the trick. Then, these studs can just rest on the bottom wind-shield to hold up the pot-stand. The two parts cannot be permanently joined because they need to be separated to nest into the cooking pot for transport.
One thing be careful about with holes drilled underneath the stand, is to make sure you drill as many air intake holes as you can. If there are not enough holes, the stove will be starved of oxygen and will run slowly with a yellow flame and create lots of soot. However, if there are adequate air intakes, the convection created by the stove should draw the air vertically up past the burner - even in windy conditions - making the operation reasonably efficient. Of course, the classic Trangia top wind-shield also keeps the flame around the pot after it leaves the burner - giving optimal efficiency - but this effect would be hard to replicate in a simple light-weight design.
| Lesson 2: | Keep the burner cool! |
But, how do you keep the burner cool in these light-weight designs ? One way is to reduced the amount of metal that the burner flame comes in contact with at the top of the stand. This could be done by reducing the width of the pot supports and increasing the depth of the flame-exit notches. Another option is to place an insulating material between the bottom of the burner and the pot stand. A third option is to totally separate the burner from the pot-stand. All three options were tested and the third one seemed to be the most effective approach.
|
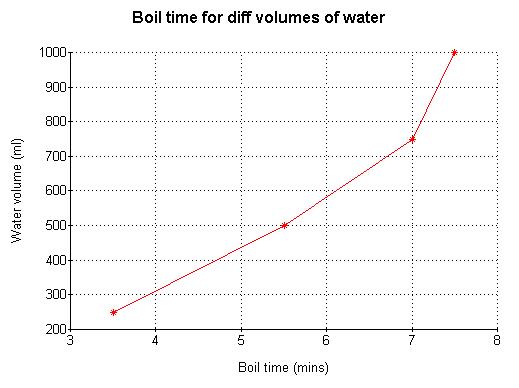
This design is simply design 3 modified by cutting a large hole in the bottom of the upper pot-stand. This allows the burner to be placed on the ground beneath the stand so that it doesn't make any physical contact. This modification had a remarkably good affect on both fuel efficiency and boil time. There are two reasons for this improvement: (1) "metho boil" is eliminated; and (2) distance between burner and pot is increased from 30mm to about 55mm. With this simple modification, boil time achieved was 8 mins +/- 30 sec (at night-time with air temp approx 15 deg C, and 1 litre of tap water). Fuel in burner at start of run was 55ml, and the burner continued running for about 3 minutes after boil was achieved. |
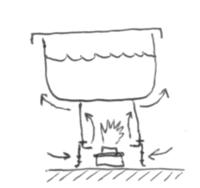 Design 4 |
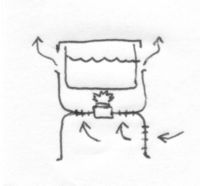 The classic Trangia | Interestingly, under exactly the same ambient conditions, the classic Trangia stove wind-shield was used and it took 9.5 minutes to boil a litre of water. So have I improved upon the classic design not only in terms of weight (60g vs 350g), but also in fuel efficiency and boil times ?? To me, it seems unlikely that a week's experimenting could improve on a 50 year old design, however research I've found on the web does indicate that Trangia's burner-to-pot distance is less than optimal. Further tests will be needed on design 4 - especially in windy conditions... |
|
A further refinement of design 4 was to find a more durable material to build the stand out of.
After many firings, the pot supports at the top of previous stand become a little soft.
A model built out of a galvanized steel downpipe fitting has been tested in the field (see picture) with great results. This material is much more durable although it results in a pot stand which is almost twice as heavy - 140g versus 75g. | 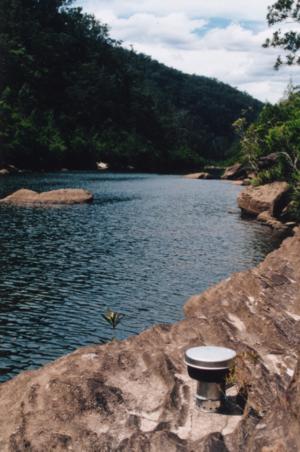
|
Upon investigating, the reason for this seemed to be the distance between the burner and the pot. If the top of the burner is about 3 cm below the bottom of the pot, sooting seems to be much less than if the burner is further from the pot. The distance of 3 cm seems to correspond to the location of the blue part of the flame. Back to the drawing board...
Design 6 is effectively the top part of the pot-stand in design 5 with the flame exits slots made slightly deeper and a number of holes drilled around one side of the base. As well as minimising sooting, these changes have the added benefit of reducing weight (to 100g) and increasing simplicity. These combined advantages should compensate for the slightly longer boil times.
The amount of sooting with this design is as low as with the classic Trangia design. To check the levels of soot, I boiled a litre of water and then wiped a tissue around the sides and base of the cooking pot. With design 5, the tissue became totally black and sooty. With this new design, there was only a slight trace of grey on the tissue.
So in the end, I have almost come full circle, back to my original design. The only real differences here are that I have used a more durable material, reduced the depth of the flame exit notches, and (most importantly) cut the bottom out of it and sat the burner on the ground to reduce metho boil.
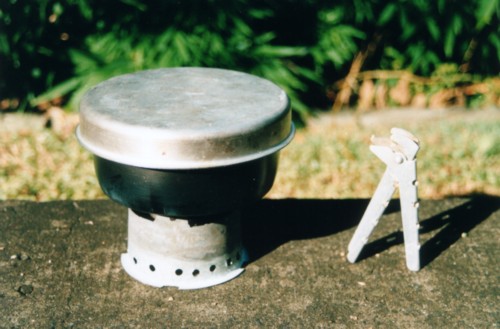
To construct this pot-stand, buy a short galvanised steel down-pipe section from your local hardware store. Its height should be about 7cm and its diameter 9.5cm. Cut four slots around the top rim, each about 2cm deep. Leave four tabs to support the pot, each about 1.5cm wide. Finally, drill holes all around the base, each with a diameter of 6 or 7mm.
At 21 deg C, this design boils a litre of water in about 10.5 minutes. At 8 deg C it takes 13.5 minutes.
A stainless steel version of this pot stand is now available to buy. Click here for details.
| Design | Lightness | Fuel efficiency | Cleaness of burning | Boil time (1L/20C)* | Burner-to-pot dist |
| Classic Trangia | ** | **** | **** | 10 mins | 3.2 cm |
| 1 | **** | * | *** | N/A | N/A |
| 3 | **** | * | ** | N/A | N/A |
| 4/5 | **** | *** | * | 9 mins | 7.5 cm |
| 6 | **** | *** | **** | 11 mins | 3 cm |
Simmering operation has never a strong point of Trangia's design due to the fiddly simmer ring. My designs still allow simmering, but due to space restrictions the simmer-ring can only be about 3/4 open. In practice, once you get a pot of water or food boiling it doesn't take much heat to maintain boiling, so a 3/4 open ring is fine.
For more details on the fuel efficiency and weight of Trangia stoves, see my
investigation into Trangia stoves, and my page on methylated spirits.
For more ideas about home-made stoves, check out Breck's projects page or the
comprehensive home-made stove archives page. You can also check out my MethLite cooking pot stand.